
3.8 Linear Shaft Motor Tuning
Linear Shaft Motor Tuning
Complete all steps on this page before proceeding to the next topic.
The axis must be Enabled to perform Auto Tune. Auto Tune cannot be performed unless both the hardware and software are enabled. See Enable Axis.
On this page
- Open I Loop Configuration
- Review Current Loop Parameters
- Auto Tune
- Monitor the Auto Tune Waveform
- Confirm Auto Tune Results
- Close Auto Tune
- Verify Updated Gains
- Save Changes
1. Open the I Loop Configuration Screen
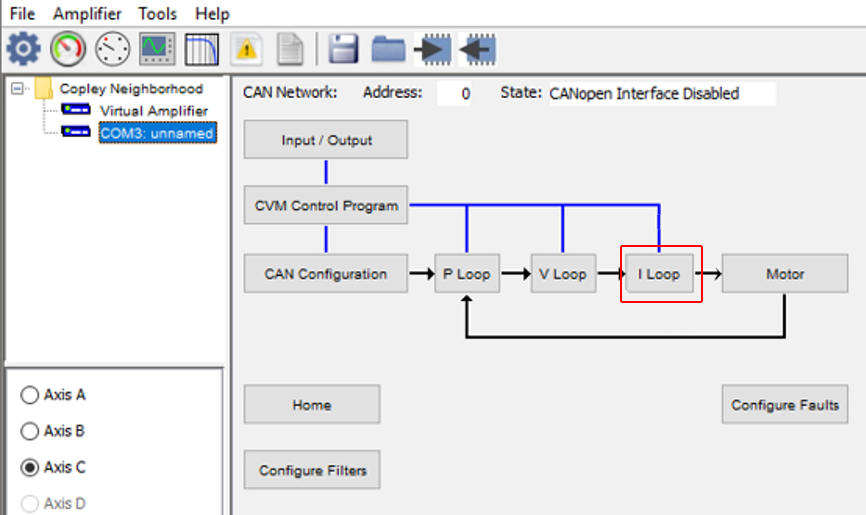
From the main amplifier screen, click the I Loop block to access the Current Loop configuration screen.
This opens the tuning interface where Peak Current, Continuous Current, Cp/Ci values, and automatic tuning options are available.
2. Review Current Loop Parameters
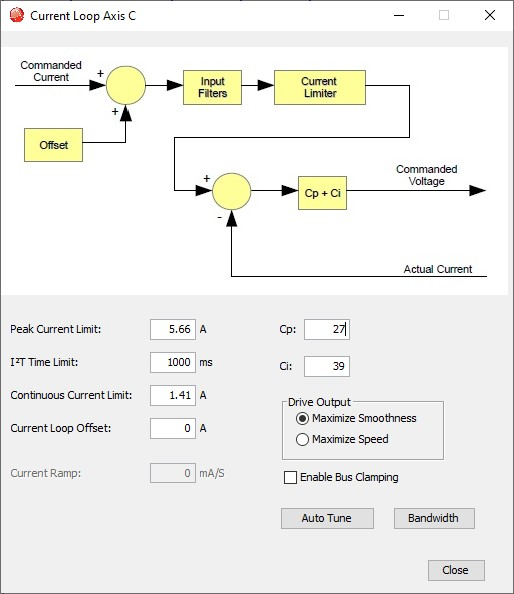
The Current Loop Axis C window displays:
- Peak Current Limit
- I²T Time Limit
- Continuous Current
- Current Loop Offset
- Cp / Ci gains
- Drive Output mode (Maximize Smoothness or Maximize Speed)
These values are derived from the motor data previously entered.
Important: Verify Current Limits Before Running Auto Tune. Before starting Auto Tune, verify that the limits displayed in the Current Loop screen match the motor specifications.
Review these parameters:
- Peak Current Limit
- Continuous Current
- I²T Time Limit
Ensure all values are within the motor manufacturer's specifications used in both the software and the motor datasheet. Current ratings may be specified as Peak Current, Continuous Current, or RMS Current depending on the motor model.
Incorrect current limit settings may cause excessive heating, reduced motor life, or permanent motor damage.
Warning: Linear motors may generate unexpected motion during the tuning process. Before running Auto Tune:
- Verify that the mover can travel freely.
- Remove any mechanical obstruction from the travel path.
- Keep clear of all moving components.
- Verify all current limits against the motor datasheet.
Failure to follow these precautions may result in motor damage or equipment damage.
Click the Auto Tune button to start the automatic current loop tuning process.
The Auto Tune screen appears and begins testing the motor’s electrical response using controlled current signals.

4. Monitor the Auto Tune Waveform
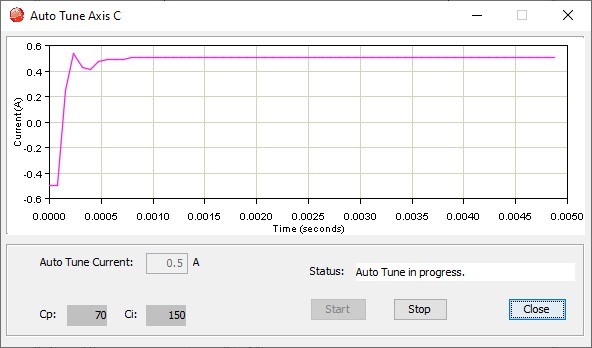
During Auto Tune:
- The live current waveform is displayed
- Auto Tune Current is shown (example: 0.5 A)
- The status bar indicates Auto Tune in progress.
- Cp / Ci are updated dynamically as measurements are taken
Allow the procedure to complete without interruption.
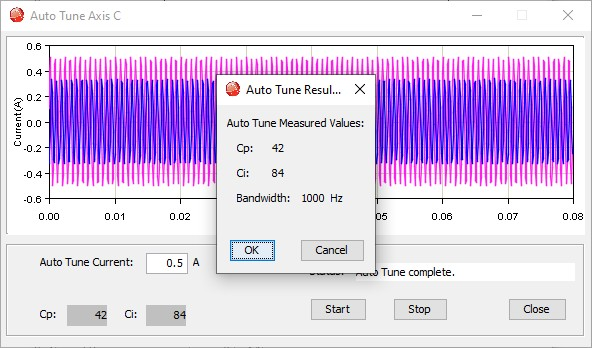
When Auto Tune finishes, a results window appears:
- Cp (Proportional Gain)
- Ci (Integral Gain)
- Bandwidth (Hz)
Click OK to accept the tuned values.
After confirming the results, click Close to return to the Current Loop screen.
The new Cp/Ci values is populated automatically.
In the Current Loop Axis C screen:
- Confirm the Cp / Ci now match the Auto Tune results
- Ensure all current limits and settings remain correct
This confirms Auto Tune applied the new tuning parameters.
After tuning is complete:
- Return to the main CME toolbar
- Click the Download to Amplifier / Save to Flash button
This permanently stores the updated current loop gains in the drive.
Continue to Scope Loop Verification -->