
3.4 Enable Axis
Complete all steps on this page before proceeding to the next topic.
On this page
The axis must be Enabled to perform Auto Tune. Auto Tune cannot be performed unless both the hardware and software are enabled.
Click the Control Panel icon on the main toolbar.
The Amplifier Control screen opens.
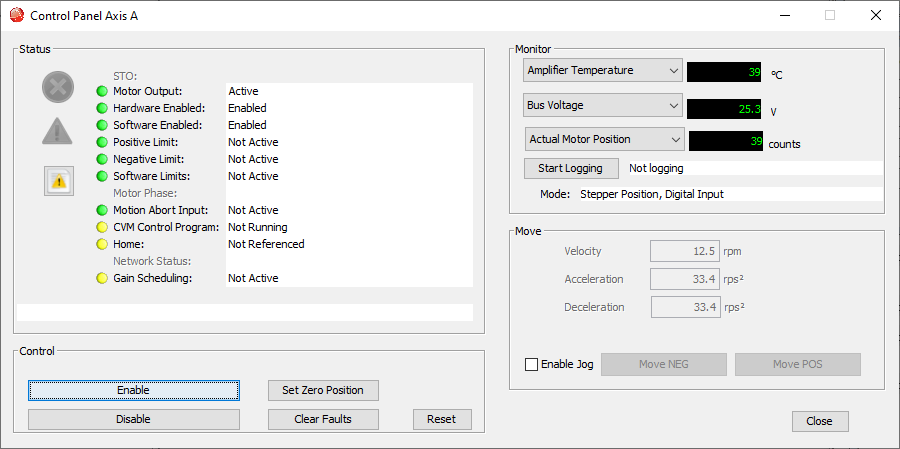
In the Status section on the left side of the Control Panel, locate the Hardware Enabled row. Ensure the CMD input corresponding to the axis (Axis A in this example) is set to Enabled.
This is typically done through the drive’s wiring or external control signal.
When the hardware signal is active, the Hardware Enabled indicator is green.

3. Enable Software
- Click the Enable button in the Control section at the bottom of the window.
The Software Enabled status indicator turns green. - Confirm All Status Indicators are normal
- Motor Output = Active (green)
- Hardware Enabled = Enabled (green)
- Software Enabled = Enabled (green)
- No warning or fault indicators
- Bus voltage and motor position values are updating normally
If any indicators are yellow or show an error condition, Auto Tune will not start.

- Click the Clear Faults button at the bottom of the Control Panel.
- After clearing the fault, repeat both Enable Hardware Enable and Enable Software steps.