
3.5 Current Loop Setup
Complete all steps on this page before proceeding to the next topic.
On this page
- Open Current Loop Configuration
- Auto Tune Function
- Hardware Disable Warning
- Start Auto Tune
- Review Auto Tune Results
- Close Auto Tune
1. Open the Current Loop Configuration Screen
- Click the I Loop button.
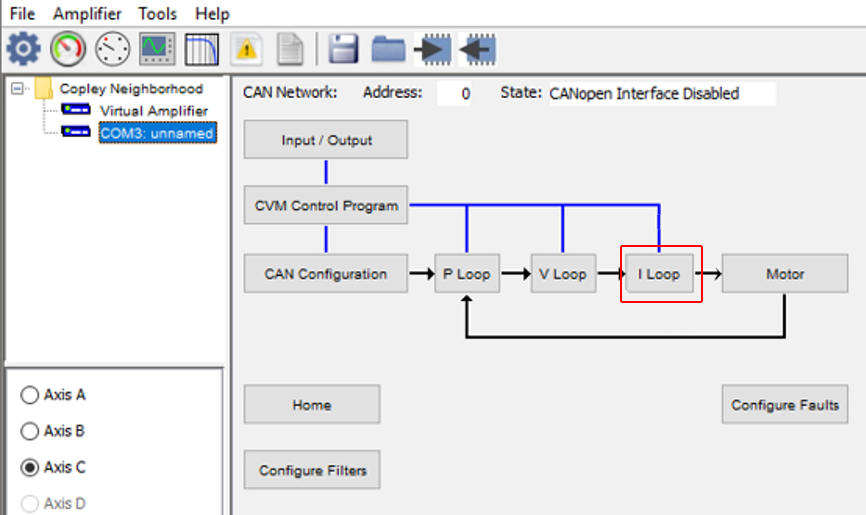
- On the Current Loop Configuration screen, modify parameters such as boost current, run current, hold current, and current loop gains, if necessary.
For this configuration, manual adjustment of the current loop parameters is not required. Use the Auto Tune function to automatically optimize the current loop gains. This ensures the current loop is properly tuned without requiring manual gain adjustments.
Run the automatic tuning process:
- Open the Current Loop Axis A window
Important: Verify Current Settings Before Running Auto Tune
Review the following parameters displayed in the Current Loop configuration window:
- Boost Current (Peak Current)
- Run Current (Continuous Operating Current)
- Hold Current (Holding Current)
- Time at Boost Current (Maximum Peak Current Duration)
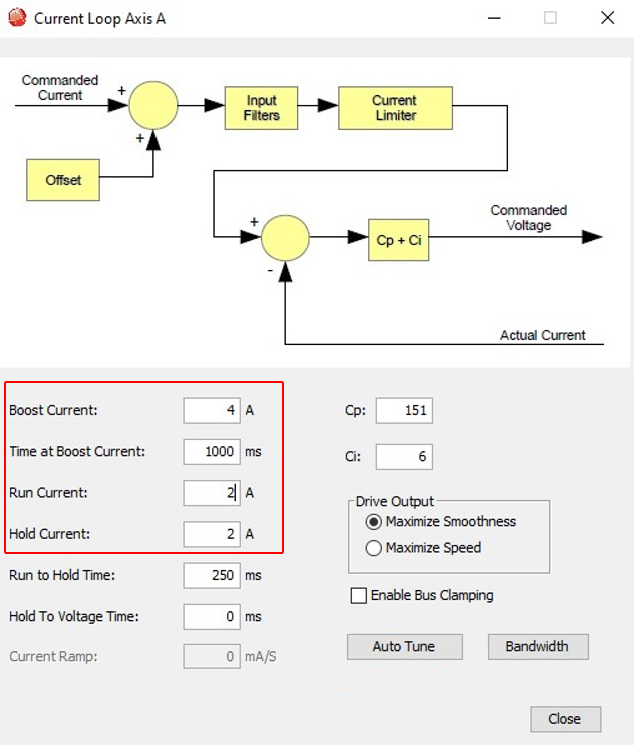
Verify these values against the motor datasheet and ensure that none of the settings exceed the motor's rated specifications.
Incorrect current settings may cause excessive motor heating and permanent motor damage.
Items to Verify
- Run Current
- Confirm that the Run Current matches the motor's continuous current rating.
Example: In cace Motor Rated Current: 2.0 A/Phase , Set Run Current: 2.0 A
- Click Auto Tune button in the lower-right section of the window.
The drive measures the motor’s electrical characteristics and automatically calculate appropriate Cp and Ci values for stable current control.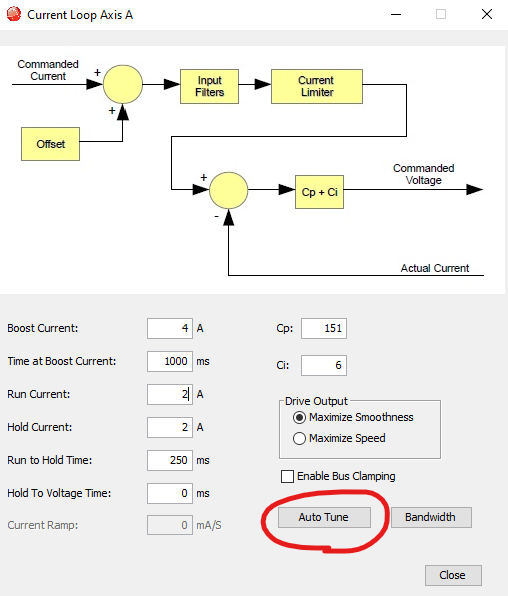
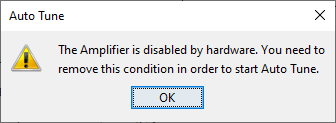
If the following warning message appears when attempting to start Auto Tune:
The Amplifier is disabled by hardware.
You need to remove this condition in order to start Auto Tune.
the axis is currently disabled and Auto Tune cannot be executed.
Resolve this issue:
- Return to the Control Panel (main amplifier screen).
- Verify the axis you are tuning (Axis A in this example) is Enabled.
If the axis is disabled, enable it manually or remove the hardware condition preventing enable. - Once the axis is enabled, run Auto Tune again.
This allows the Auto Tune process to start correctly.
4. Start the Auto Tune Process
When the Auto Tune Axis A screen opens, the system is ready to begin automatic tuning of the current loop parameters.
- Review the Auto Tune Current and Current Offset values.
These are automatically selected based on the motor data and amplifier settings. - Click the Start button.
The drive starts to inject test signals into the motor and measure the response to calculate optimal Cp and Ci values.
Note: A real‑time graph of motor current versus time appears in the upper section of the window, showing the tuning process in progress.
The status indicator is Auto Tune in progress.
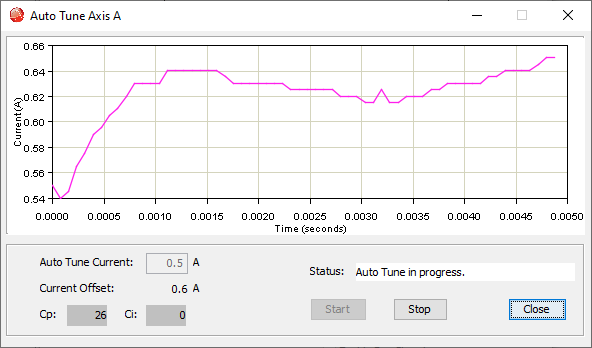
Auto Tune runs automatically and requires no further user input until it is completed.
5. Review Auto Tune Results and Confirm
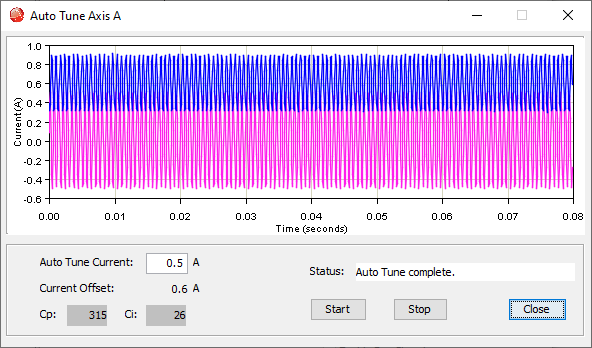
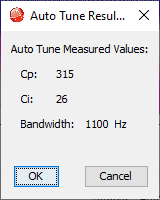
When Auto Tune is complete, a results window shows the automatically calculated current loop parameters.
- Cp (Proportional gain)
- Ci (Integral gain)
- Bandwidth (Current loop bandwidth in Hz)
- Review the measured values for your motor.
- Click OK to accept the results.
- Click OK on the confirmation message to apply the new Cp and Ci values to the Current Loop settings.
6. Close Auto Tune Save the New Gains to Flash
When Auto Tune is complete, review the resulting waveform and the updated Cp and Ci values displayed at the bottom of the screen.
- Click Close to exit the Auto Tune screen and return to the main Current Loop configuration screen.
Important: The Cp and Ci values obtained from Auto Tune must be saved to the drive. Failure to save the values to flash causes the Auto Tune results to be lost when the amplifier is powered off or reset. - Click the Download to Amplifier / Save to Flash button on the main toolbar.
Failing to save the values to flash causes the Auto Tune results to be lost when the amplifier is powered off or reset.
Always perform a flash save immediately after completing Auto Tune.
Continue to Linear Shaft Motor Setup -->