Example of generated source code
To better appreciate how a Plugin form will be converted to source code, let us take the following example form and see what the code will look like:
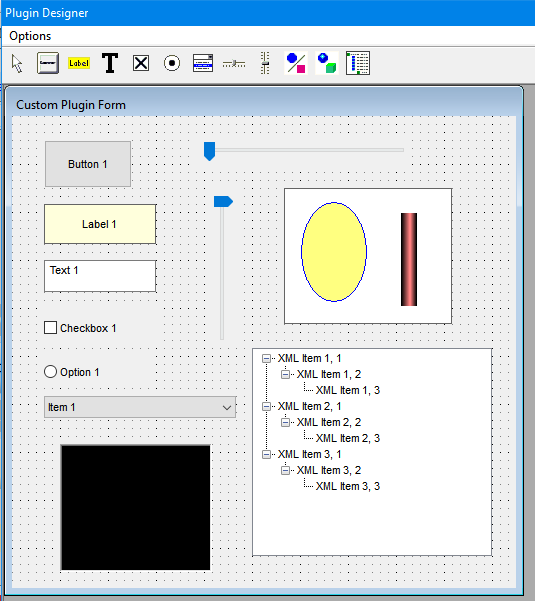
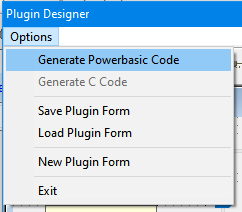
After selecting the "Generate Powerbasic Code" option from the Options menu
the following code will be what is generated and put into the Windows clipboard:
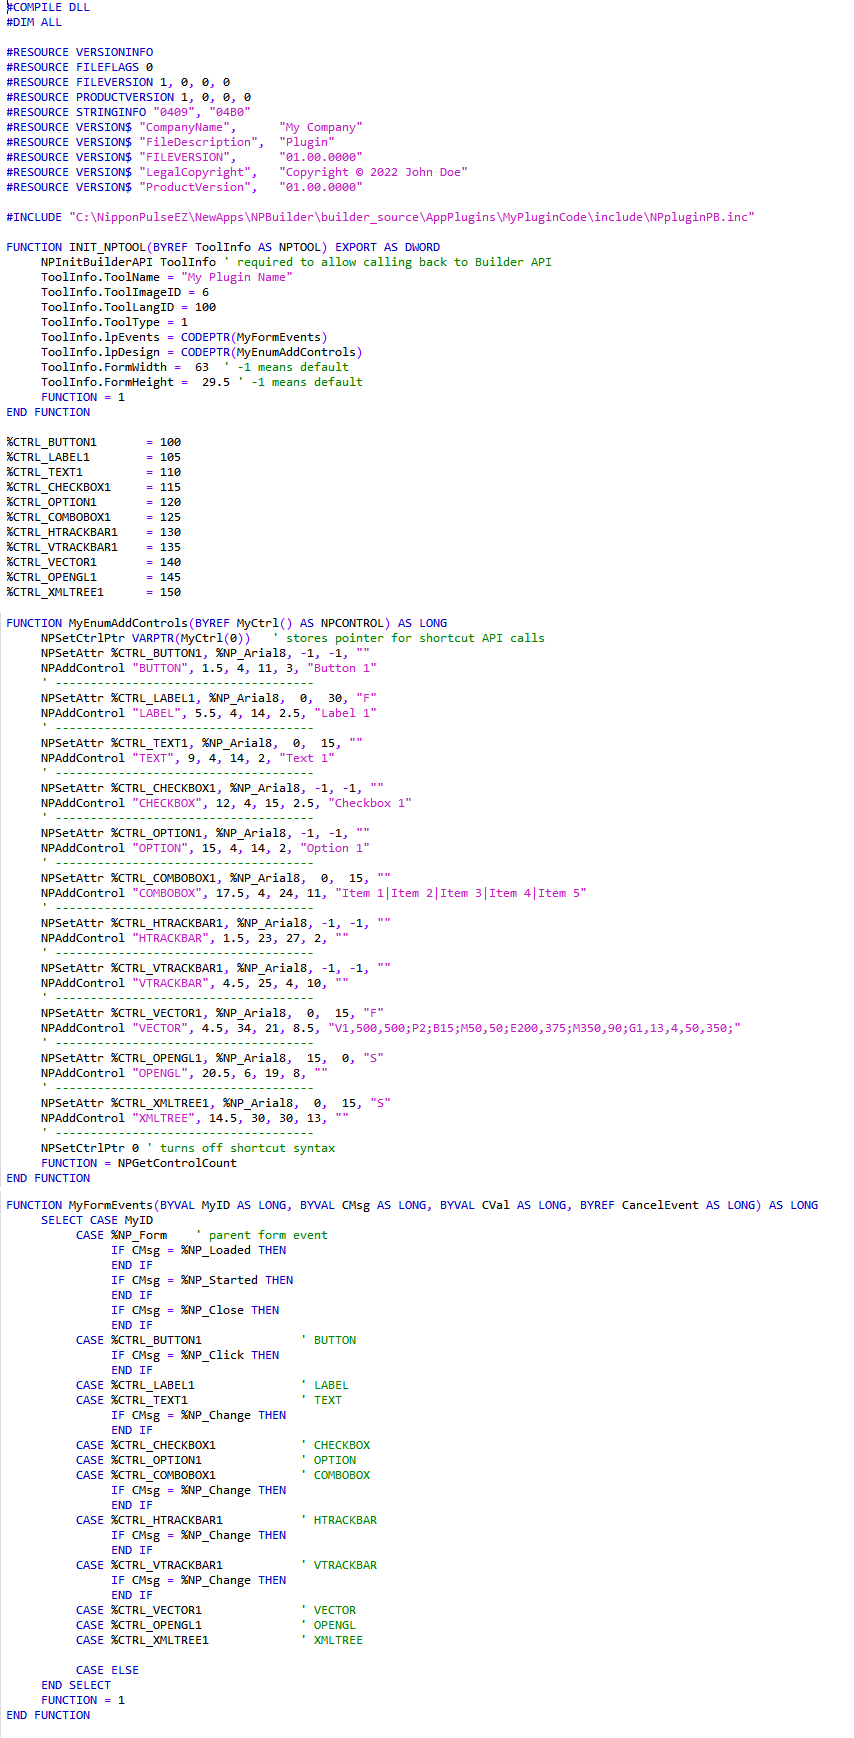
Now let us explain what is in the code above step by step:
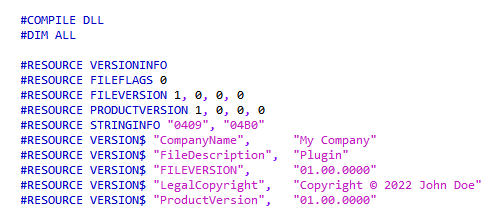
(1) Here the code tells the compiler to compile the code into a standard Windows DLL (Dynamic Link Library).
Also it describes the data for the file version which will be embedded into the DLL.
(2) Here the code defines an include file (header file) which contains a number of predefined routines to make coding easier.

Currently only the header file for Powerbasic is provided, but future versions will have a header for the C language.
(3) Next the Entrance into the Plugin is defined. NPBuilder will call this function to load the Plugin into the application.

The structure (or TYPE as it is called in Powerbasic) NPTOOL is defined in the previous header file.
This function is only called one time when the Plugin is first loaded. The structure contains some key information NPBuilder needs to be able to use the plugin.
In the structure ToolInfo above the fields in the structure are filled in first by a call to a function in the header file called:
NPInitBuilderAPI
This routine retrieves critical fields in the NPTOOL structure such as pointers to callbacks in the NPBuilder application.
This is necessary for two way communication between the Plugin and the NPBuilder application.
This routine is defined in the Plugin header file.
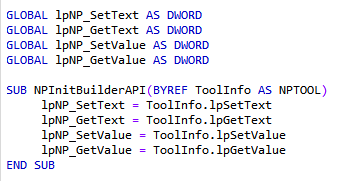
The pointers are stored in Global variables which then can be used with four prototype functions (or subroutines) which allow making a callback from the Plugin back to the NPBuilder application.
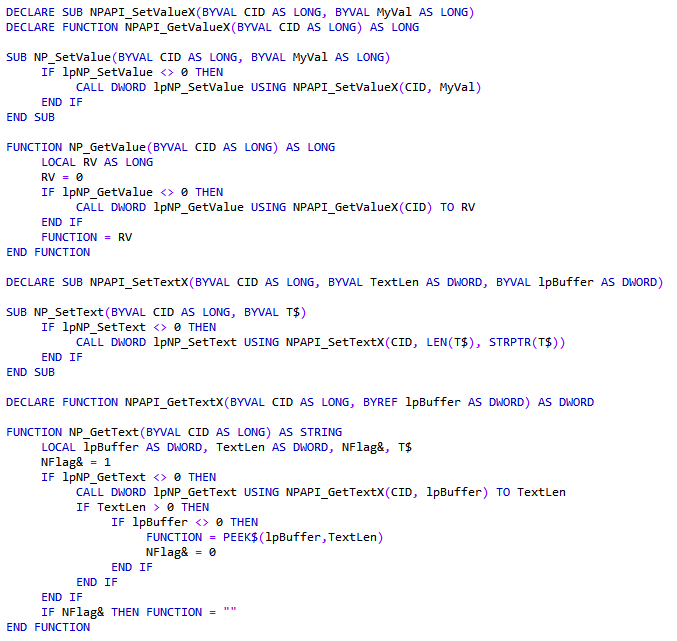
Rather than call the NPAPI functions in NPBuilder directly via pointers each time, the above routines do it for you and you have a simple API defined in the header file to call instead.
There are four routines in the header file you can call to talk to the NPBuilder application and your Plugins dialog:

In essense you have two routines for Text ( NP_SetText and NP_GetText ) and two routines for Numeric values (32 Integers) ( NPSetValue and NP_GetValue)
Lastly, your plugin must fill in fields in the NPTOOL structure manually to pass back to the NPBuilder application which define your Plugin and its Dialog.

The fields you must fill in are:
.ToolName defines name of Plugin to be displayed in Plugin toolbar
.ToolImageID defines which builtin image to use on the Plugin

Note: Images are from left to right starting with index # 1
.ToolLangID defines the Language ID to use (use 100 for now)
.ToolType defines what type of Plugin it is. (1 = BScript Editor Plugin, 2 = Code Block Editor Plugin)
.lpEvents defines a code pointer to the event routine in the plugin
.lpDesign defines a code pointer to the design routine in the plugin
.FormWidth defines the Plugin forms width (in character units which are normally 8 x 16 pixels)
.FormHeight defines the Plugin forms height (in character units which are normally 8 x 16 pixels)
(4) Constants are defined for each control's ID number.
Each control on the Plugin form is referenced by an ID number. To illustrate, imagine you want to reference a how on a street. Each house has a unique house (ID) number.
This is how controls on your form are referenced, by each ones unique ID (house) number.
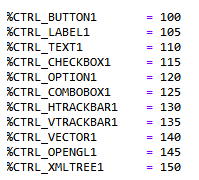
The NPBuilder Plugin Visual Designer generates the control ID numbers in steps of 5. This allows you to add other controls manually coded later with an ID number between two existing controls.
(5) Function for designing the Plugins Form when NPBuilder requests it.
This function is called once every time the Plugins Dialog is displayed.
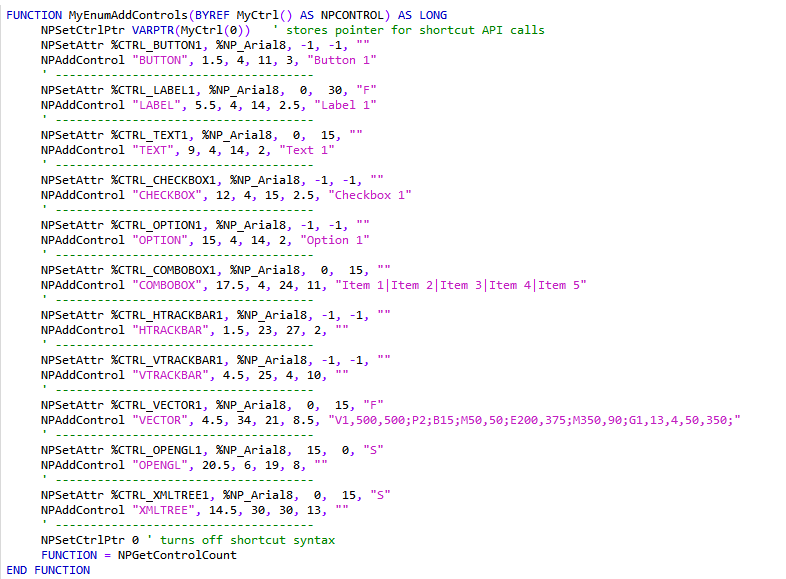
There are two ways to define controls in this function. One is to use a structured array (NPCONTROL) and fill it with data about each control.
An easier way is to use some provided functions to call which fill the array for you. The above code uses this technique.
NPBuilder passes a pointer to the structured array as a parameter which expects the type of NPCONTROL which is defined in the header file.
NPBuilder will fill the structure with predefined default values. The cbsize field tells the plugin how big the structure is in bytes which allows future changes in NPBuilder.
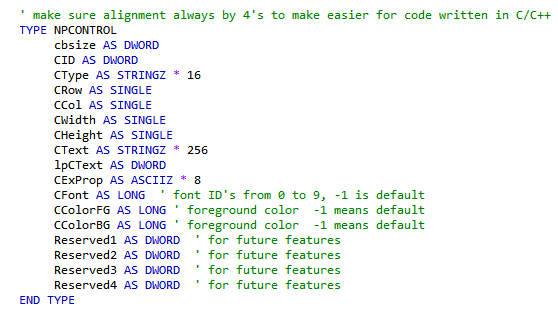
Using the shortcut technique, two predefined functions in the header file are called per each control:
Here is the actual code from the header file for each routine:
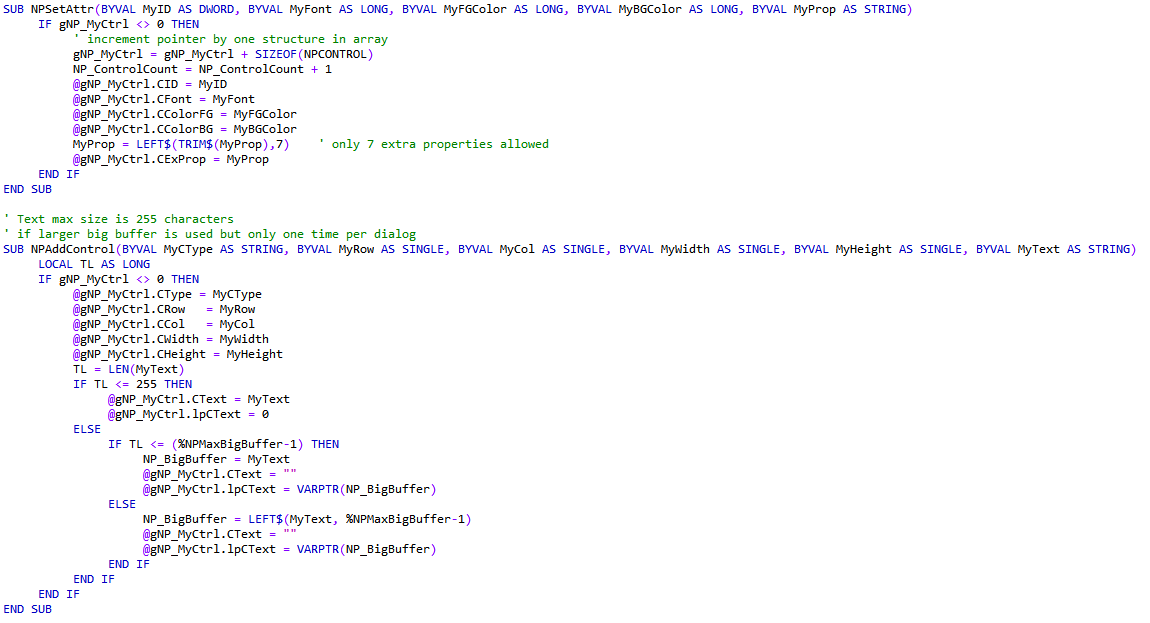
The parameters for each routine are as follows:

MyID is the controls ID number
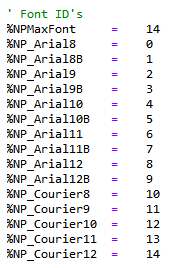
MyFont is a value from 0 to 14 which is an index number for the font
MyFGColor is a value from 0 to 31 which is an index number for the foreground color
MyBGColor is a value from 0 to 31 which is an index number for the background color
MyProp is a string which defines the properties for the control (each property is usually a single character)
The colors defined are the same as the DOS Basic colors. Colors 0 to 15 are the same as in QuickBasic. Colors 16 to 31 are pastel versions of the previous 16 colors (0 to 15).
The font ID's are in the Plugin header file:

MyCType is the controls Type (ie. BUTTON, COMBOBOX, TEXT)
MyRow is the Row position (in character units) of the controls top / left corner
MyCol is the Column position (in character units) of the controls top / left corner
MyWidth is the width of the control (in character units)
MyHeight is the height of the control (in character units)
MyText is the initial Text of the control (for non-text controls it may be a definition string to define more properties)
Once you define your controls, NPBuilder will then use this data to actually create your form and the controls in it. Your Plugin form will then be displayed.
(6) Process Events for your Plugin Form
Lastly there needs to be a way to process events for your Plugins dialog (form). Each control already has a unique ID number so you can know which control generated an event. The form itself can also generate events and it has a ID of zero (ie. %NP_CLOSE event).
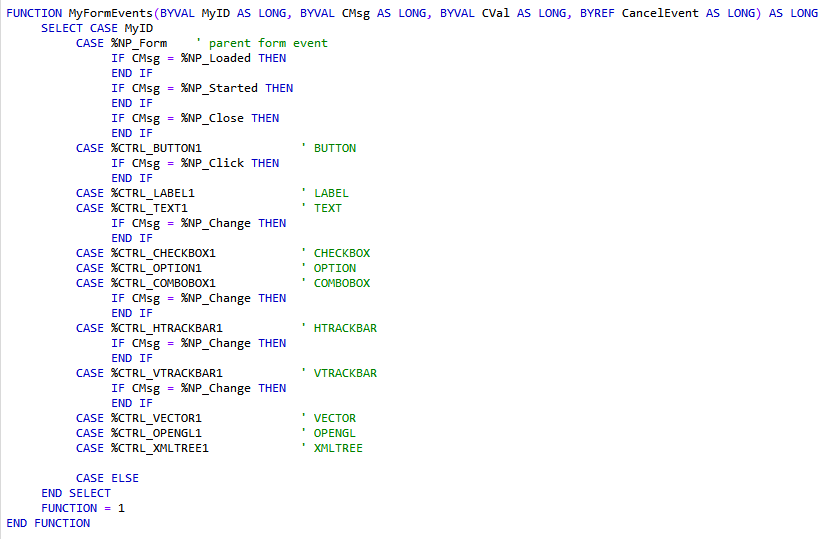
This function in your plugin is passed four parameters:
MyID is the Control (or Form is zero) which generated the current event
CMsg indicates which what event occurred
CVal is a value the event may need to pass for some controls (ie. Trackbars pass their current position)
CancelEvent is by default a value of zero. If you set this parameter to 1 (non-zero) then it tells NPBuilder to Cancel the event if that is an available option
The Plugin header file contains the constants for the currently supported events. More events may be added in future versions.
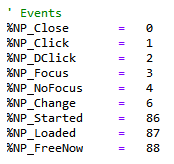
For example if a BUTTON control is clicked by the mouse (or similiarly clicked via keyboard) the control ID for the BUTTON control will be passed in the MyID parameter and the CMsg parameter will have the value %NP_Click in it.
When a form is first loaded (exists and controls are on it, but form not yet visible) it will send the %NP_Loaded event.
When a form is closed it will send the %NP_Closed event.
By processing the events in the event routine you can make your Plugin be able to respond to user input.
